Unlocking Authentic Texture: A Practical Guide to Handdrawn Ink Brushes Photoshop
Digital art often struggles with a specific kind of sterility. No matter how skilled the artist, pixels can sometimes feel too perfect, too smooth, and ultimately devoid of the human touch that makes traditional media so compelling. This is where Handdrawn Ink Brushes Photoshop become an essential tool in your creative arsenal. These digital assets are designed to bridge the gap between the tactile feel of a dip pen on paper and the efficiency of modern software. Whether you are a professional illustrator, a marketer creating unique social media graphics, or a hobbyist looking to elevate your sketches, understanding how to properly select and apply these brushes is crucial for achieving high-quality results.
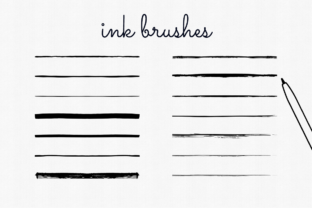
The appeal of ink-style illustration lies in its versatility. A set of high-quality ink brushes allows you to create simple black and white sketches with fine, crisp borders, or apply a handcrafted aesthetic to icons and logos. However, simply downloading a file and starting to paint often leads to disappointing outcomes. Many creators overlook the nuances of brush settings and line weight variation, resulting in artwork that looks like a generic filter rather than a genuine artistic expression. To truly leverage the power of these tools, one must move beyond basic application and understand the mechanics behind the strokes.
Common Pitfalls When Selecting and Using Digital Ink Tools
One of the most frequent mistakes creators make is assuming that all ink brushes function identically. You might download a pack expecting fluid, variable lines, only to find static stamps that repeat patterns obviously. This misunderstanding can severely affect the quality and presentation of your work. When evaluating a package, such as a set containing 13 black ink brushes, it is vital to check if the brushes respond to pressure sensitivity. Without this feature, your lines will lack the dynamic thickness that characterizes real ink work. Real ink flows; it pools at the start of a stroke and tapers off at the end. If your digital tool cannot mimic this behavior, your illustrations will feel rigid and lifeless.
Another significant oversight involves the expectation of immediate perfection without adjusting settings. Beginners often apply a brush at 100% opacity and full flow, which can create harsh, unforgiving edges. While this works for certain graphic styles, it fails to capture the organic "bleed" or texture associated with handmade ink. The best results usually come from experimenting with opacity jitter and flow control within the brush settings panel. By dialing these back slightly, you allow the texture of the brush tip to show through, creating a more authentic, weathered look that resonates better with audiences seeking a human connection.
The Critical Role of Line Weight Variation
Perhaps the most overlooked detail in digital inking is the management of line weight. In traditional drawing, an artist naturally varies pressure to create thick downstrokes and thin upstrokes, giving the subject form and depth. When using Handdrawn Ink Brushes Photoshop, failing to replicate this variation flattens the image. A common error is using a single brush size for the entire illustration. This approach makes icons and characters look two-dimensional and amateurish.
To avoid this, adopt a workflow that prioritizes line hierarchy. Use thicker strokes for outer contours and shadowed areas, while reserving finer tips for internal details and highlights. The specific set mentioned earlier, which includes examples of applied brushes, demonstrates this principle clearly. Notice how the example illustrations utilize different line weights to define shape without relying on color fills. If you find yourself struggling to vary line width manually, consider enabling the "Size Jitter" controlled by pen pressure in your brush dynamics. This small adjustment can transform a uniform scribble into a professional-grade sketch.
Evaluating Package Contents for Maximum Value
Before committing to a download or purchase, savvy creators should scrutinize what is actually included in the package. It is not enough to see a pretty preview image; you need to know what files you are getting and how they integrate into your workflow. A robust package should ideally include the .abr file, which is the native format for Adobe Photoshop brushes. This ensures seamless installation and compatibility. Beware of packages that only provide PNG images of brush tips, as these require manual setup and often lack the complex programming needed for realistic ink behavior.
Furthermore, the inclusion of example files is a strong indicator of quality. A set that provides six PNGs showing the brushes in action offers more than just inspiration; it serves as a practical tutorial. By opening these example files, you can inspect the layers, see exactly which brush was used for specific textures, and analyze the stroke order. This reverse-engineering approach is one of the fastest ways to learn. Ignoring these resources means missing out on valuable insights into how the creator achieved those specific effects. Always check if the package contains both the tools (the brushes) and the proof of concept (the illustrations).
Avoiding the "One-Size-Fits-All" Mindset
A subtle but damaging habit is trying to force a specific brush set to do everything. Some users attempt to use rough, textured ink brushes for clean, technical iconography, or conversely, use smooth vector-like brushes for gritty, grunge illustrations. This mismatch leads to friction in the creative process and subpar final products. The 13 black ink brushes in a typical high-quality set are likely optimized for specific tasks—some for sketching, others for filling, and some for adding grain or noise.
The corrective approach is to categorize your brushes before you begin. Test each one on a scrap canvas to understand its personality. Does it drag? Is it wet? Is it dry and scratchy? Once you understand the characteristics of each tool, you can assign them to specific roles in your project. For instance, use the driest brush for initial concept sketching where erasing and reworking is common, and switch to the boldest, darkest brush for final inking. This strategic selection improves efficiency and ensures that the final output communicates the intended mood effectively.
Ultimately, the goal of using Handdrawn Ink Brushes Photoshop is to enhance your storytelling, not distract from it. When used correctly, these tools disappear into the artwork, leaving the viewer with the impression of a hand-crafted piece rather than a digital construction. By avoiding the traps of static lines, ignoring pressure sensitivity, and neglecting to study provided examples, you position yourself to create work that stands out in a saturated digital landscape. Take the time to understand your tools, respect the nuances of line weight, and always look for the human element in your digital creations. With the right approach, these brushes become an extension of your hand, allowing your unique style to shine through with clarity and confidence.